The Renaissance Man was taking a few days off of work, and so we decided to target this week to finish off the path. This is where we left off, and you can read Part One of the Gravel Path Construction to get up to speed. Originally I was going to do a two part series, but this project had too many steps, so look for Part Three of the Gravel Path Construction tomorrow for the final product!


My Dad came over a few weeks ago and built the frame necessary to pour a concrete ramp up to the shop. We’ve been “walking the plank” so to speak to access the shop in the meantime.

From the side you begin to see the slope of the ramp entering the shop.

My Dad also thought it would be a good idea to add a little gate to the side of the shop. The gate certainly wasn’t part of the original “path plan,” but it’s great and I’m so happy we have it! Now we can put things back there without someone from the street peering into our backyard.

One might think that the next step was just to pour concrete and be on our way. Finding someone to deliver concrete was the next challenge. I did the math and we would need about 1.25 yards. I looked in to having 80 pound bags of concrete delivered from Home Depot and renting a mixer, or having a mini-concrete mixer deliver the concrete.
Turns out the cost for both options was about the same, so we decided to go with the Miller’s Mini Mix concrete from Hillsboro to save us the time and energy of mixing concrete and renting more equipment. Since we live about an hour away from Miller’s Mini Mix, they would only deliver on a weekday at 8am. So I took Thursday morning off work to be there for the concrete delivery.

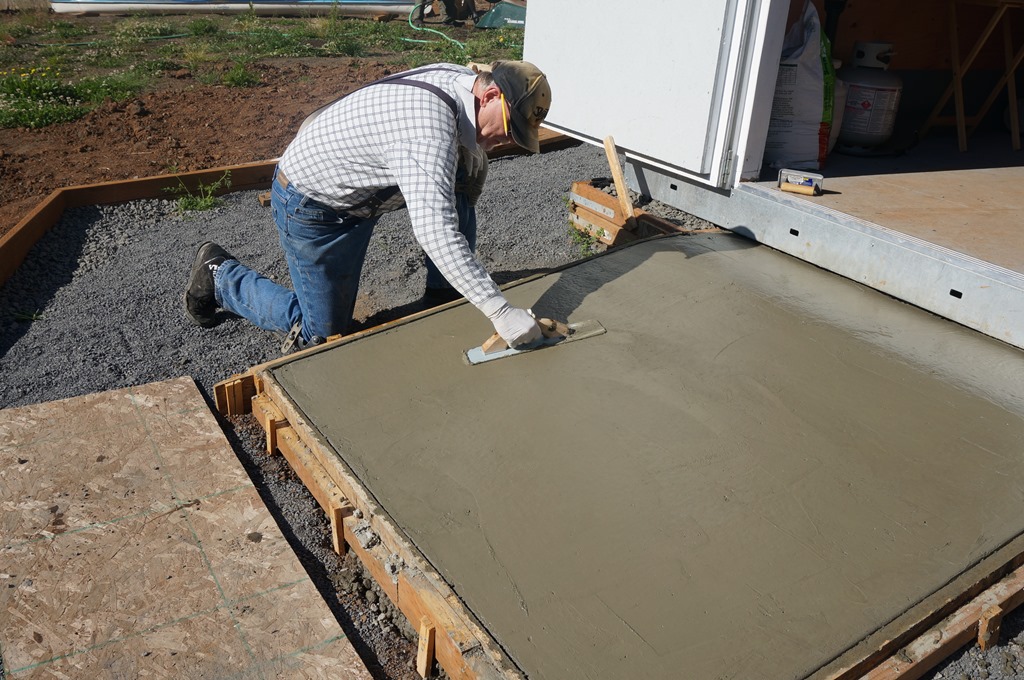
Here’s The Renaissance Man oiling the inside of the frame so that it would come off easily once the concrete dried. Basically the same concept as oiling a baking pan. My Dad also reinforced the ramp with rebar for extra strength.

Now it’s important to note that a lot of things happened between the previous picture and the following one.
We moved 30 wheelbarrows of concrete up the hill to the shop in 15 minutes (let me take a moment to wipe the sweat off my forehead).
Yes, we only had 15 minutes to unload the concrete. Every additional minute we took, we’d be charge an extra dollar. It was like being on one of those crazy “push your self to the limit” game shows. I owe a big shout out to my college athletic trainer Curtis! I moved half of those wheel barrows…yes, HALF by myself! If it hadn’t of been for Curtis and all of the training we did in college, I would have doubted that I was even capable. I’m also happy to report we didn’t have to pay a single extra dollar!
At one point I even heard The Renaissance Man make small talk with the Concrete Truck Operator and say “She’s a keeper isn’t she?” That’s right, I’m a keeper!
But I think I’ll keep my day job, that was hard work.
My Dad and I then used a long 2×4 to skim the top of the form and pull the concrete from the bottom all the way to the top of the ramp.


I’ve mentioned before that my Dad was a Concrete Carpenter, but he steered clear of concrete finish work as much as possible. Finish work takes time, it’s fussy, and requires lots of patience. So I owe a BIG THANKS to my Dad, for doing something he doesn’t like to do. The concrete formed was edged several times throughout the process to knock the rock down from the surface and to provide a clean edge to the finished ramp.

Before you put in texture, it’s important to get everything nice and smooth.

And here is a great piece of advice if you’re ever going to get concrete delivered. As much as you measure and plan, it’s better to error on the side of having too much concrete than not enough. With that said, find a place in your yard to put the extra concrete. We ended up filling in this corner area of the back retaining wall.

Once the concrete dried to the right consistency it was time to pull in some texture. We just used a simple broom. The texture is important so that you don’t slip in the rain or winter weather.


My Dad then finished the final edging.


And ta-da! When I got home from work that afternoon, the forms had been removed and our concrete ramp was looking good! Go team!

You’ll notice that the ramp isn’t centered on the door. The Renaissance Man was thinking about functionality for entering the shop, so we added a little extra space to the right side of the ramp so you’ll have a spot to stand when locking/unlocking and opening the door. Such a great idea, he’s a keeper too!


Up next, we move the rest of the gravel into place and finish off the path!
Part Three: Gravel Path Construction “The Icing”
Part One: Gravel Path Construction … just incase you missed it!
[…] Part Two: Gravel Path Construction […]